
Setting Up Your First Node.js Application Step-by-Step
Across the Internet, every modern web application, API, or backend service you interact with often runs on JavaScript outside the browser. But browsers are not the only place JavaScript lives. To run JavaScript on your computer or server, we use a runtime called Node.js.
In this blog, we will understand how to install Node.js, verify the installation using the terminal, explore the Node REPL, create your first JavaScript file, run it using the node command, and finally build a simple Hello World server. By the end, you will have a fully working Node.js setup and your first backend application running locally.
First, let’s understand how to install Node.js.
Installing Node.js
Node.js is an open-source JavaScript runtime that allows you to execute JavaScript code outside the browser. It is built on Chrome’s V8 engine and is widely used for building fast, scalable network applications.
To install Node.js, visit the official website at nodejs.org. You will see two versions available for download: LTS (Long Term Support) and Current. For beginners and production environments, always choose the LTS version. It is stable, well-tested, and receives long-term security updates.
Download the installer for your operating system (Windows, macOS, or Linux) and follow the setup wizard. Keep the default options selected, especially the one that adds Node.js to your system PATH. This step ensures you can run node and npm commands from any terminal window without configuring environment variables manually.
Once the installation finishes, you are ready to verify it.
Checking installation using terminal
After installing Node.js, the next step is to confirm that it was installed correctly. Open your terminal (Command Prompt or PowerShell on Windows, Terminal on macOS/Linux) and type the following command:
node -v
This command asks: What version of Node.js is currently installed on my system?
If the installation was successful, you will see a version number like v24.12.0 The exact number may vary depending on when you install it.
v24.12.0
Node.js also comes bundled with npm (Node Package Manager), which helps you install third-party libraries, manage project dependencies, and run scripts. To check npm, run:
npm -v
You should see a version number like 11.6.2 If both commands return versions without errors, your setup is complete and ready for development.
Now let’s explore an interactive feature of Node.js.
Understanding Node REPL
REPL stands for Read-Eval-Print Loop. It is an interactive command-line environment where you can type JavaScript code, press Enter, and see the result immediately.
To start the REPL, simply type:
node
You will notice the terminal prompt changes to >. This means you are now inside the Node.js environment.
Try typing simple JavaScript expressions:
> 2 + 3
5
> console.log("Hello, Suprabhat")
Hello, Suprabhat
undefined
The REPL reads your input, evaluates it, prints the output, and loops back for the next command. It is extremely useful for testing small code snippets, checking syntax, or experimenting with JavaScript features without creating a file.
To exit the REPL, press Ctrl + C twice or type .exit and press Enter.
While REPL is great for quick tests, real applications are written in files. Let’s create one.
Creating first JS file
Open your favorite code editor (VS Code is highly recommended for beginners). Create a new folder for your project, for example my-first-node-app. Inside this folder, create a new file named app.js.
Now, write a simple JavaScript statement inside the file:
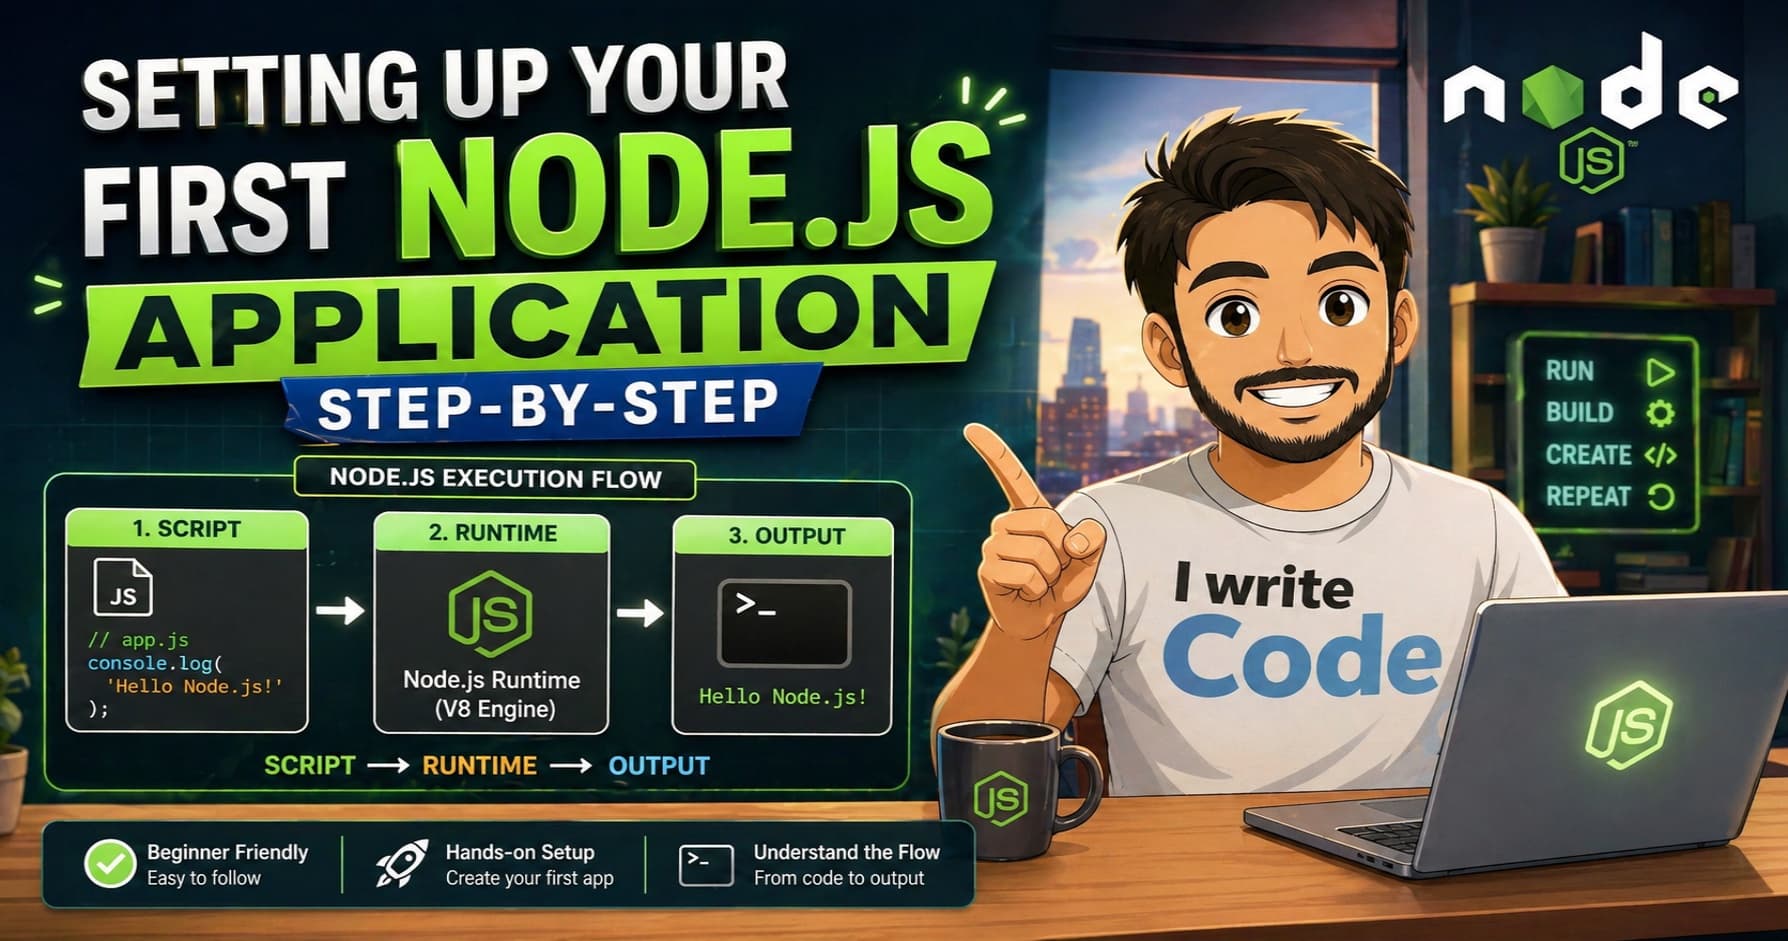
console.log("Welcome to Node.js, Suprabhat!");
Save the file. Unlike browser JavaScript, Node.js does not need an HTML file or a browser window to run. It executes JavaScript directly from your terminal.
Before running it, make sure your terminal is pointing to the correct folder. Use the cd command to navigate:
cd path/to/my-first-node-app
Now you are ready to execute the script.
Running script using node command
To run your JavaScript file, use the node command followed by the filename:
node app.js
Behind the scenes, Node.js reads the file, compiles the JavaScript using the V8 engine, and executes it line by line.
You should see the following output in your terminal:
Welcome to Node.js, Suprabhat!
If you make changes to app.js, you will need to run the node app.js command again to see the updated output. Node.js does not auto-reload by default, which keeps it lightweight and predictable.
This simple workflow, write, save, run, is the foundation of every Node.js application. Now let’s take it one step further and build a real server.
Writing Hello World server
So far, we have run simple scripts. But Node.js shines when it comes to building network servers. Let’s create a basic HTTP server that responds with “Hello World” when you visit it in a browser.
Replace the content of app.js with the following code:
const http = require('http');

const server = http.createServer((req, res) => {
  res.writeHead(200, { 'Content-Type': 'text/plain' });
  res.end('Hello World from Node.js!\n');
});

const PORT = 3000;
server.listen(PORT, () => {
  console.log(`Server is running at http://localhost:${PORT}`);
});
Let’s break down what this code does:
require('http')loads Node.js’s built-in HTTP module, which handles web requests.http.createServer()creates a server that listens for incoming connections.The callback function receives
req(request) andres(response). Every time someone visits the server, this function runs.res.writeHead(200, ...)sets a successful HTTP status code and tells the browser to expect plain text.res.end()sends the final response and closes the connection.server.listen(3000)starts the server on port 3000 and prints a confirmation message.
Save the file and run it again:
node app.js
You will see:
Server is running at http://localhost:3000
Open your browser and visit http://localhost:3000. You should see “Hello World from Node.js!” displayed on the page.
To stop the server, press Ctrl + C in the terminal.
Connecting your local server to real web requests
When you visit http://localhost:3000 in your browser, the same networking process happens that powers real websites. Your browser sends an HTTP request to your local machine. Node.js receives it, processes it through the server callback, and sends back the response over a TCP connection. Because TCP guarantees delivery and order, your browser receives the exact text you defined in res.end().
This is the exact foundation that scales into real-world APIs, authentication systems, and full-stack applications. Every production Node.js server starts with this same pattern: listen on a port, handle requests, and send responses.
Conclusion
Node.js makes it incredibly simple to run JavaScript outside the browser and build fast, scalable server applications. From installing the runtime and verifying it in the terminal, to experimenting in the REPL, running your first script, and launching a working HTTP server, you have now completed the essential first steps of Node.js development.
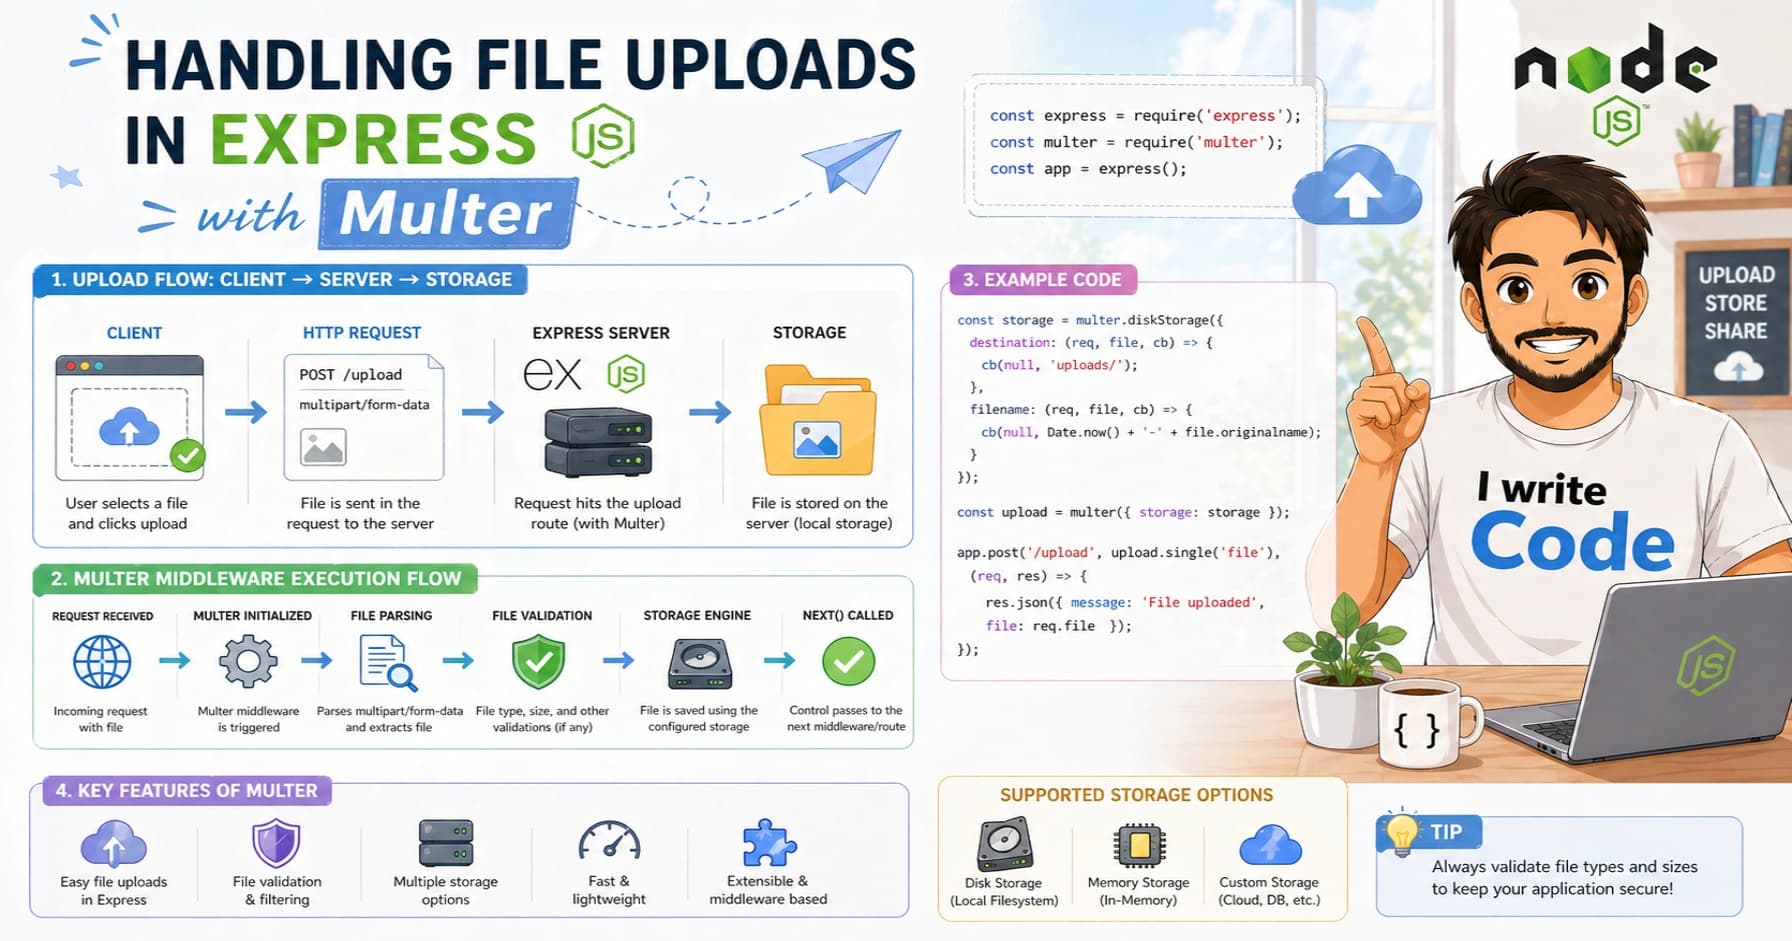
Understanding this workflow gives you a clear picture of how backend applications start, how servers listen for requests, and how JavaScript powers both the frontend and the backend. In the next steps, you can explore npm packages, routing, Express.js, and connecting to databases.
Every large-scale Node.js application begins exactly like this, one file, one command, and one running server.